 Save Pin
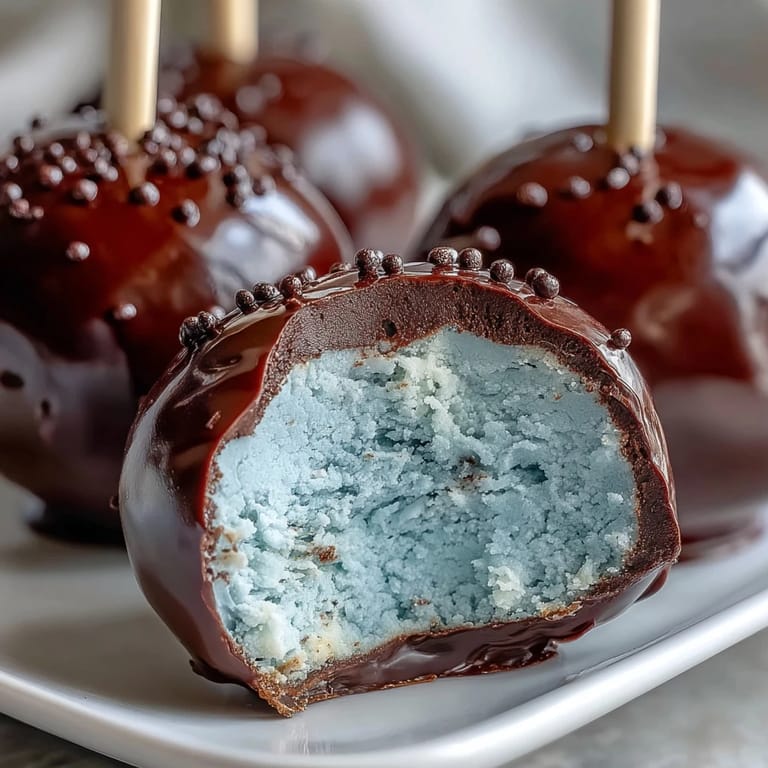
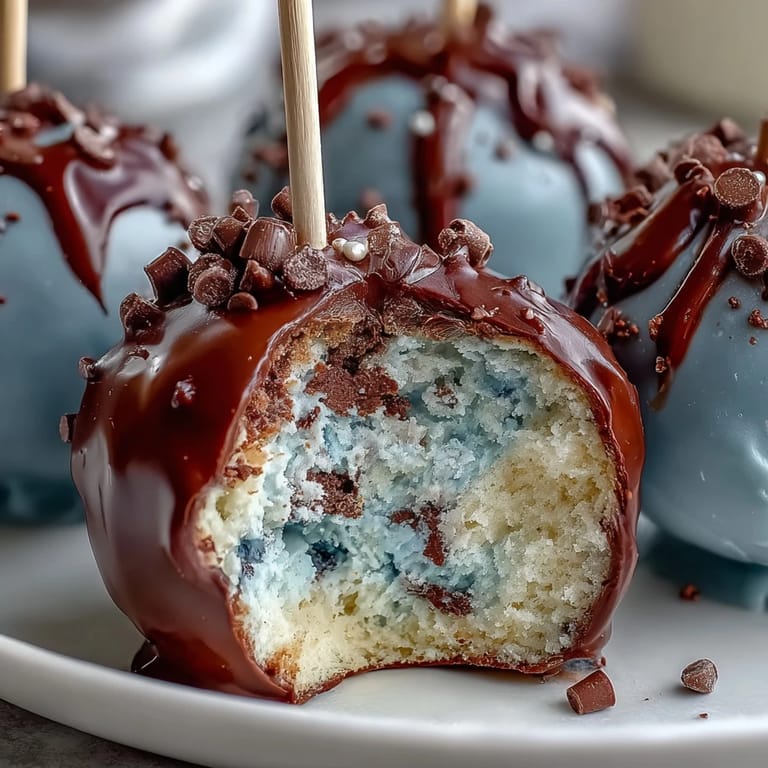
 My sister called me three days before her Easter brunch in a mild panic—she needed something small, elegant, and blue for her dessert table. I'd never made cake pops before, but there was something about the challenge that felt right. Turns out, those little robin's egg blue spheres became the unexpected star of the afternoon, and now they're my go-to when I want to feel like I've done something a bit fancy without the fuss.
What I didn't expect was how my nephew would line them up by color intensity, turning the dessert table into some kind of artistic display. He took photos, showed his friends, and suddenly these weren't just sweets—they were conversation pieces. Sometimes a recipe works best when it gives people a reason to pause and look up from their plates.
Ingredients
- 1 box vanilla cake mix: Use a quality mix or bake from scratch if you're feeling ambitious—the flavor base matters since everything else builds on it.
- Eggs, oil, and water as required by cake mix: Follow the package instructions exactly; moisture balance affects how well the crumbs hold together later.
- 1/2 cup unsalted butter, softened: Room temperature is non-negotiable here or you'll be beating for ages without getting that fluffy frosting texture.
- 1 1/2 cups powdered sugar: Sift it first if you see lumps, otherwise you'll end up with a grainy frosting that affects your final coating.
- 2 tbsp milk: Whole milk gives better results than skim, and it helps you reach the right consistency for mixing with cake crumbs.
- 1 tsp vanilla extract: Don't skip this; it's the backbone of flavor in a neutral frosting.
- 12 oz white candy melts or white chocolate: Candy melts are more forgiving for beginners, but real white chocolate tastes noticeably better if you're patient with tempering.
- Blue gel food coloring: Oil-based is crucial—water-based coloring causes chocolate to seize and ruin your coating, a lesson learned the hard way.
- 2 tbsp coconut oil or vegetable shortening: This thin your coating just enough to get that smooth, even coverage without making it so runny it slides off.
- 1 tbsp cocoa powder: The speckles are what make these look intentional and artistic rather than just plain blue.
- 1 to 2 tsp vodka or clear extract: Mix this with the cocoa to get a paint-like consistency that flicks beautifully across each pop.
- Luster dust for optional sparkle: A tiny touch transforms them from cute to camera-ready.
- 24 lollipop sticks: Wooden ones feel sturdier in hand than plastic.
- Styrofoam block or cake pop stand: Essential for letting them dry upright without toppling or creating flat spots.
Tired of Takeout? 🥡
Get 10 meals you can make faster than delivery arrives. Seriously.
One email. No spam. Unsubscribe anytime.
Instructions
- Bake your cake and let it cool completely:
- Follow the box instructions or your recipe, then give the cake at least an hour to cool—warm cake won't hold together when you crumble it. Line your work surface with parchment for easy cleanup later.
- Make the frosting until it's cloud-like:
- Cream the softened butter until it's pale and fluffy, about two minutes, then add sugar gradually while mixing. Drizzle in the milk and vanilla, beating until you reach a consistency that's smooth but not runny—this becomes the glue holding your cake balls together.
- Crumble the cake and mix gently:
- Break the cooled cake into a large bowl until you have fine crumbs, then add frosting bit by bit, mixing with your hands until the mixture just barely holds together. You're looking for a dough-like texture that doesn't crumble when you squeeze it, but isn't so wet it sticks to everything.
- Roll and chill your balls:
- Shape the mixture into 24 roughly equal balls about the size of a walnut, place them on a parchment-lined sheet, and pop the whole thing in the freezer for at least fifteen minutes. Cold cake balls don't fall apart when you dip them.
- Melt and tint your chocolate coating:
- Use a double boiler or microwave in short twenty-second bursts, stirring between each interval, until the candy melts are glossy and smooth. Add blue gel coloring drop by drop, stirring well after each addition, until you reach that perfect robin's egg shade—it'll look slightly more vibrant than you want because it dulls slightly as it cools.
- Stick your pops and refrigerate:
- Dip each stick tip into the blue coating, then push it halfway into a cake ball with a gentle twist. Stand them all upright in your Styrofoam block and refrigerate for ten minutes so the stick anchors firmly.
- Coat each pop with the full dip:
- Hold a pop by its stick and dip it fully into the blue chocolate in one smooth motion, then let the excess drip off for a few seconds before standing it upright again. Do this in batches so the coating doesn't cool and thicken too much between pops.
- Add the speckled finish:
- Mix cocoa powder with vodka or extract until it's thin enough to paint but thick enough to hold its color. Dip a clean food-safe brush into the mixture and flick it gently across each blue pop to create those natural-looking speckles that make them feel handcrafted.
- Let them set completely:
- Wait at least an hour before handling them, though overnight is better if you're not in a rush. The coating will harden to a satisfying snap.
 Save Pin
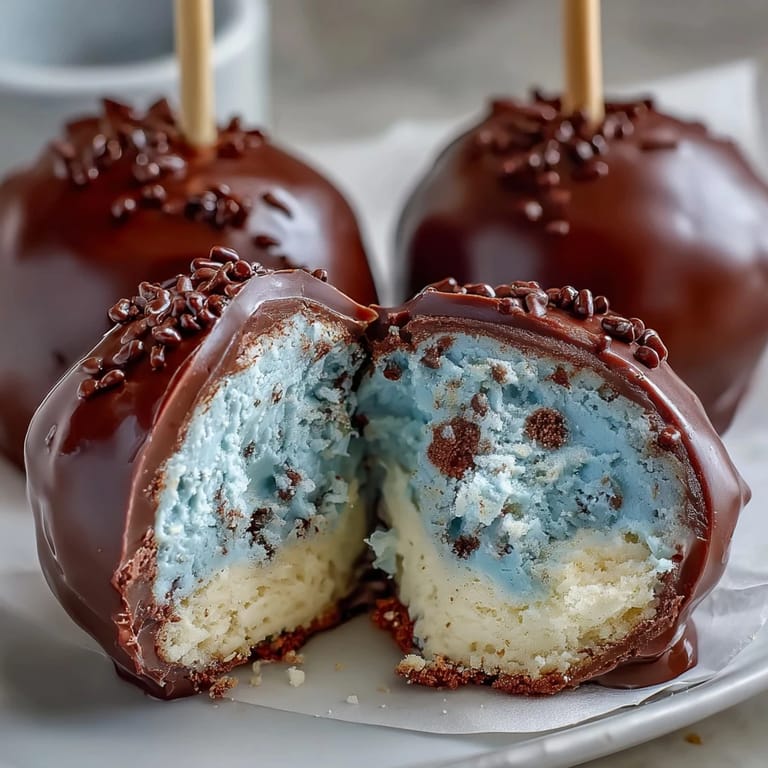
 There's a quiet satisfaction in watching a plain cake ball transform into something jewel-like. My mom showed up while I was sprinkling the cocoa speckles and spent five minutes just watching, asking why I hadn't been making these all along.
The Rhythm of Cake Pop Assembly
The actual process feels meditative once you get into it. You fall into a pattern: dip, drip, stand, move to the next one. There's no rushing this part because hurrying leads to broken balls and wasted coating. Some people set up a little assembly line on the counter, but I prefer working with one pop at a time, paying attention to how the chocolate clings and sets.
Why the Color Matters More Than You'd Think
That robin's egg blue isn't just pretty—it's instantly recognizable and seasonal, which makes people feel like you understood the occasion. I've experimented with soft pastels and deep teals, but there's something about that specific shade that reads as spring. The speckles add dimension so they don't look flat or artificial, which is the difference between looking homemade and looking like you actually cared.
Storage and Make-Ahead Strategy
These are genuinely a gift from the perspective of timing. You can bake and assemble them three days ahead, keeping them at room temperature in an airtight container, or refrigerate them for up to a week if you want extra insurance. I've found that room temperature is actually better for serving—cold pops feel slightly firmer and less pleasant to bite into. If you're making them for an event, tackle the baking and crumbling a day or two before, freeze the balls, then do the coating and decorating the morning of your gathering.
- Freeze unbaked cake crumbs in an airtight container for up to two weeks if life gets in the way of your plans.
- The blue coating can be made ahead and gently reheated when you're ready to dip.
- Keep your Styrofoam stand handy in case you need to adjust a pop's angle while it's setting.
 Save Pin
 These little blue bites have quietly become my solution for when I want to bring something that feels special without spending all day in the kitchen. They've shown up at baby showers, spring brunches, and Easter baskets, and they're always the first thing to disappear.
Recipe FAQs
- → What gives the coating its robin's egg blue color?
Blue gel food coloring is added to melted white chocolate or candy melts to achieve the robin's egg hue without affecting the smooth texture.
- → How do I ensure the coating is smooth and easy to dip?
Incorporate a small amount of coconut oil or vegetable shortening into the melted white chocolate to thin it, creating a smooth coating ideal for dipping.
- → What’s the purpose of the cocoa powder and vodka mixture?
This mix creates a speckled effect when gently flicked onto the coated treats, adding a festive, decorative touch reminiscent of robin’s eggs.
- → Can I prepare these treats ahead of time?
Yes, they can be refrigerated for up to a week or stored at room temperature for several days while maintaining freshness and appearance.
- → Are there any tips for achieving firm pops that hold their shape?
Chilling the shaped balls before dipping and using sturdy lollipop sticks inserted halfway help maintain shape and stability during coating and serving.
- → Is it possible to modify the flavor of the frosting?
Yes, adding extracts like lemon or almond to the frosting provides a custom flavor twist without altering texture.