 Save Pin
 The first time I managed to bake a batch of nut-free granola bars, my kitchen was so fragrant with toasted oats and sweet honey that I nearly forgot why I was making them—mostly for friends who can never have nuts. On a warm afternoon, with sunlight streaming onto the counter, I found myself humming along to an old playlist and pressing the mixture into the pan, realizing just how satisfying the process can be. I like that these bars always feel like a small victory, especially when the ingredients meld perfectly without sticking to my fingers. There's an effortless charm to this recipe: no need to fuss over complicated steps or worry about substitutions for nut allergies. Whether packed in lunchboxes or brought along to a picnic, these chewy bars have quickly become a staple in my snacking routine.
I remember bringing a tin of these to the beach last summer just as my cousins were searching for safe snacks for their kids. The kids ended up crowding around, picking out their favorite dried fruit bits, and asking if they could have seconds. We spent the afternoon munching between salty swims, and it felt good knowing nobody had to glance anxiously at ingredient labels. That day, I realized how much this simple recipe could connect people, even among sandy towels and sunscreen smells. It's a small gesture, but I still love making these for group outings just in case.
Ingredients
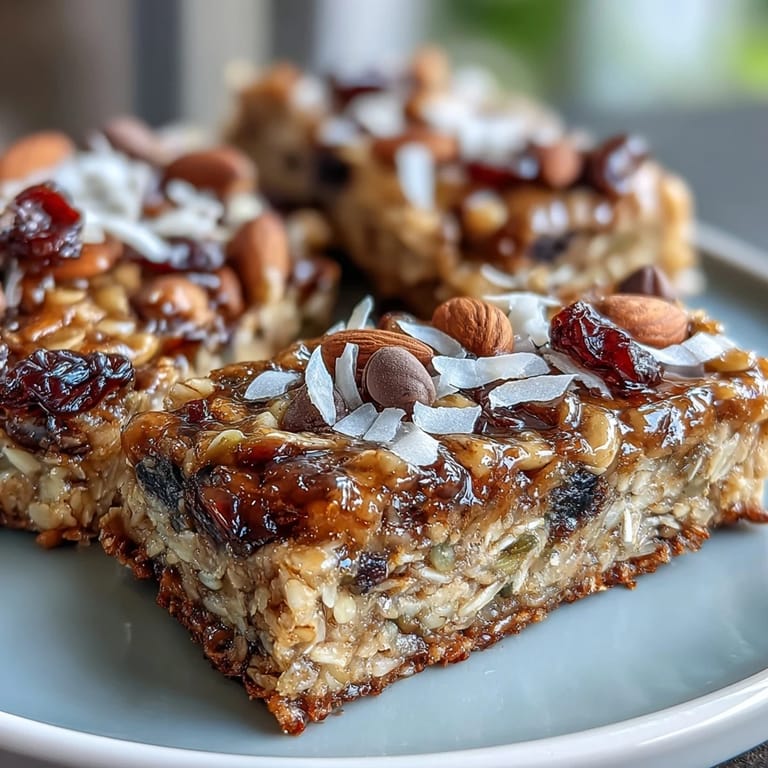
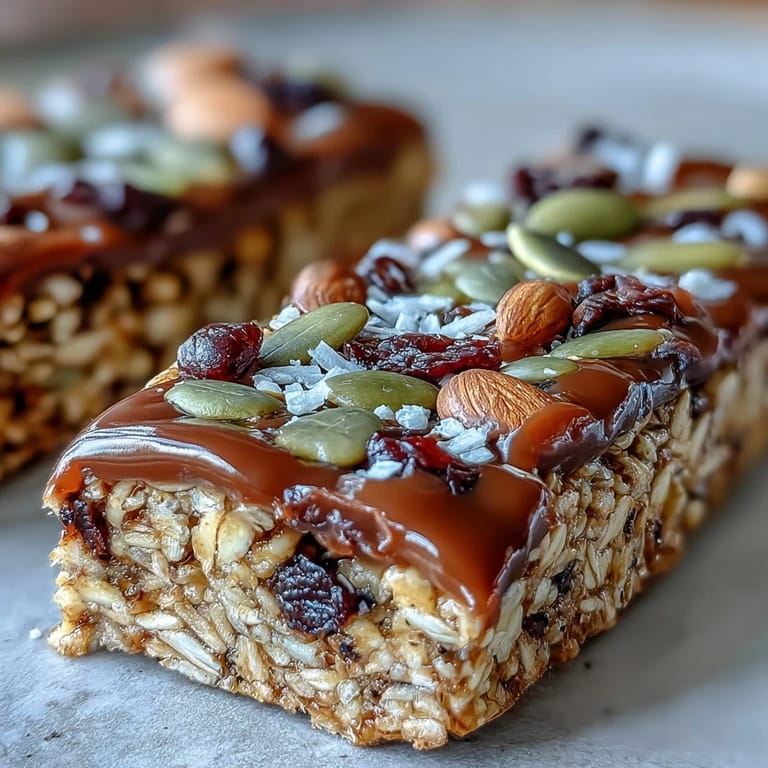
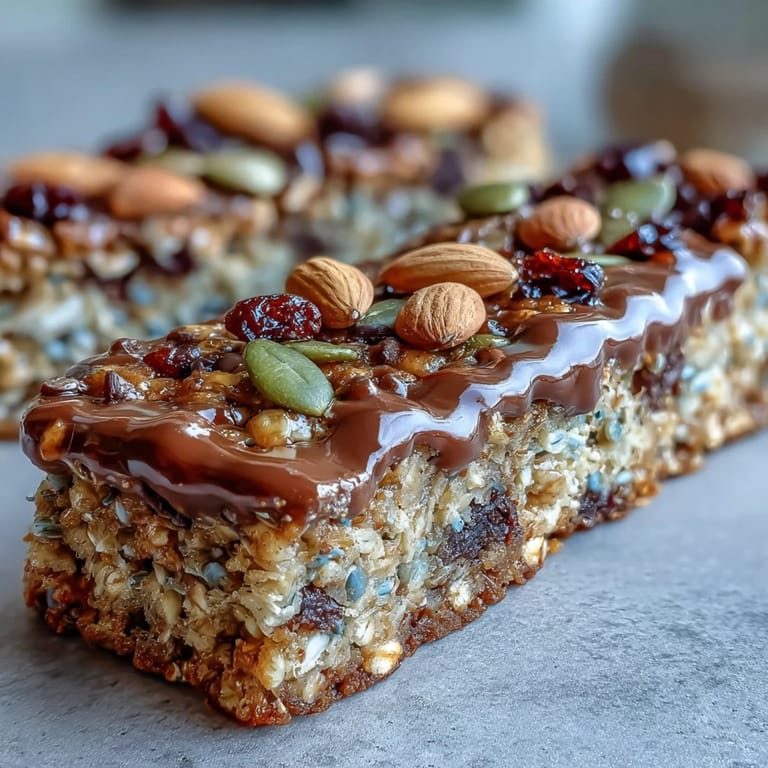
- Old-fashioned rolled oats: The heart of the granola bar, oats make these chewy and satisfying—using rolled oats gives the best texture without turning mushy.
- Unsweetened shredded coconut: I find this gives a gentle bite and light sweetness; be sure to use unsweetened so the bars don't turn overly sugary.
- Pumpkin seeds (pepitas): Their subtle crunch is key for contrast—I like to toast them briefly for extra flavor.
- Sunflower seeds: These round out the crunch and keep the bars nut-free; make sure to use raw, unsalted seeds for best results.
- Dried cranberries or raisins: Chopped into tiny pieces, these add pops of tartness and keep each bar exciting; any dried fruit works if you want to mix and match.
- Mini chocolate chips (optional): Toss these in last—they melt just enough for a ribbon of chocolate without overpowering the other flavors.
- Fine sea salt: A pinch brings out all the sweetness and flavor; don't skip it, even if it seems minor.
- Ground cinnamon: This adds a subtle warmth that ties everything together; I once tried it without cinnamon, and the bars felt a little flat.
- Honey: It binds everything together with gentle sweetness—try to use a mild, runny honey for easy mixing.
- Sunflower seed butter or tahini: This replaces nut butters, keeping things smooth and allergy-friendly; tahini offers a deeper flavor, so choose based on your taste.
- Coconut oil, melted: Helps the bars stay moist and chewy; measure it after melting for the most accurate amount.
- Pure vanilla extract: One teaspoon gives the whole batch a lift; always check labels for hidden allergens if baking for others.
Tired of Takeout? 🥡
Get 10 meals you can make faster than delivery arrives. Seriously.
One email. No spam. Unsubscribe anytime.
Instructions
- Preheat & Prep the Pan:
- Get the oven warming to 350°F (175°C) and line your baking pan with parchment paper, letting the sides overhang so you can lift the bars out easily later.
- Mix the Dry Ingredients:
- Pile oats, coconut, pumpkin and sunflower seeds, dried fruit, and chocolate chips into a big bowl, then sprinkle in salt and cinnamon—run your hands through the mix and enjoy the texture.
- Warm the Wet Ingredients:
- Combine honey, sunflower seed butter, coconut oil, and vanilla in a small saucepan over low heat; stir until smooth and just warmed, but not bubbling.
- Combine & Coat:
- Pour the glossy wet mixture over the dry ingredients, then use a spatula to fold everything together gently until every oat is slick and sticky.
- Press & Compact:
- Scoop the mixture into your prepared pan and press down firmly using the back of a spoon or measuring cup—the firmer you pack it, the less crumbling later.
- Bake to Golden:
- Slide the bars into the oven and bake for 20–25 minutes, watching for golden edges and a slightly set center.
- Cool & Slice:
- Let the bars cool completely on a wire rack so they firm up; then lift with the parchment, slice into even bars, and savor the neat edges.
- Store Smart:
- Pop the bars into an airtight container at room temperature for up to a week, or stash them in the fridge if you like a crunchier bite.
 Save Pin
 One chilly autumn afternoon, I found myself baking these for a neighbor's bake sale, hoping to contribute something entirely safe for everyone. When the bars sold out before anything else, I felt a quietly proud smile tugging at my face. Seeing kids and parents chat, swap bites, and request the recipe reminded me how food can bring peace of mind and happiness at once. It was more than a snack—it was a slice of inclusivity. Those moments stick with me every time I bake a batch, and I hope they will for you as well.
How to Make Granola Bars Even Better
After a few tries, I realized toasting the oats and pumpkin seeds for five minutes before mixing gives the bars a surprisingly nutty aroma, even without actual nuts. It's a little step, but the payoff in flavor depth and crispiness is huge. Sometimes, I swap out the dried cranberries for chopped dried apricots or cherries for a tangy kick. The recipe is endlessly adaptable—add a handful of flaxseed or chia for extra crunch, or toss in some dairy-free chocolate chips if you want a hint of decadence. These tweaks keep each batch just different enough, making snack time anything but boring.
Allergy-Friendly Strategies for Snacking
When baking for friends with various allergies, I double-check every package label, even for seemingly safe ingredients like oats or honey. Using sunflower seed butter instead of tahini also helps avoid sesame for those sensitive to it; always ask before baking for new guests. Choose dairy-free chocolate chips if needed, and confirm coconut isn't an issue for your crowd—tree nut allergies vary. Keeping a stash in the fridge means you can grab and go for busy days, and pre-slicing makes sharing simple. That mindfulness takes snacks from good to great.
Oven Timing, Storage, and Sharing Tricks
The hardest part is always waiting for the bars to cool so you can slice them cleanly. I usually set a gentle reminder on my phone to resist temptation, and I've learned to use a sharp serrated knife for nice squares. Store your cut bars in parchment layers for mess-free snacking, and refrigerate if you want to keep them extra chewy. Don't forget, these freeze beautifully if you make a double batch for busy weeks ahead.
- Let your bars cool fully before slicing for best texture.
- Wrap them individually for grab-and-go convenience.
- Try freezing extras for long-term storage—they thaw quickly on busy mornings.
 Save Pin
 Granola bars baked with care become more than just a snack—they're easy to share, safe to savor, and always worth a spot in your kitchen routine. Enjoy every chewy bite, and don't be surprised if you're asked for the recipe more than once.
Recipe FAQs
- → What makes these bars nut-free?
No nuts are used—sunflower seed butter or tahini replaces traditional nut spreads, and seeds add crunch.
- → Can I substitute honey for a vegan option?
Yes, use maple syrup or agave nectar in place of honey for a fully plant-based snack.
- → How do I store these granola bars?
Keep in an airtight container at room temperature for up to a week, or refrigerate to extend shelf life.
- → What can I add for extra flavor?
Try different dried fruits, seeds, or dairy-free chocolate chips. Toast oats and seeds for extra crunch.
- → Are these bars suitable for vegetarians?
Yes, all ingredients are vegetarian-friendly. Make sure to use dairy-free chocolate if needed.
- → What allergens should I watch for?
Check for coconut and sesame (in tahini). Always verify ingredient labels for hidden allergens.