 Save Pin
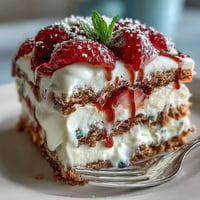
 I discovered hojicha panna cotta on a quiet afternoon in a small Tokyo café, where the server brought out this impossibly silky dessert that tasted like toasted tea leaves and cream clouds. There was something almost meditative about how the roasted green tea flavor wasn't sharp or grassy, but warm and nutty, like sitting by a window on a cool day. When I got home, I knew I had to recreate it, but I wanted to give it texture and playfulness, so I added layers of bright berries and granola that crunch under your spoon. The first time I made it for friends, they went quiet for a moment, then asked for the recipe before they'd even finished their glasses.
My sister came home from a stressful week, and I'd made these the night before without telling her. When she opened the fridge and saw four beautiful parfaits waiting, she actually teared up a little. She said it wasn't the dessert itself, but knowing someone had thought ahead just for her. That's when I realized this dish isn't really about showing off technique, it's about the small kindness of something beautiful that tastes even better than it looks.
Ingredients
- Heavy cream: This is what makes the panna cotta silky and rich, so don't try to cut corners with lower fat versions or you'll end up with something grainy instead of cloud-like.
- Whole milk: Balances the cream so the hojicha flavor shines through without tasting heavy or overly sweet.
- Hojicha tea leaves: The roasted green tea is the soul of this dessert, with a toasty, almost coffee-like depth that makes people guess what they're tasting.
- Granulated sugar: Just enough to complement the slight bitterness of the tea without making it taste like candy.
- Powdered gelatin: Bloom it properly in cold water first, or you'll get lumps that no amount of stirring will fix.
- Vanilla extract: A touch that rounds out the flavors and prevents the tea from tasting one-dimensional.
- Mixed fresh berries: Strawberries, blueberries, and raspberries together give you tartness, sweetness, and color all at once.
- Granola: The texture hero, keeping everything from feeling too soft and sleepy, whether you buy it or make your own.
Tired of Takeout? 🥡
Get 10 meals you can make faster than delivery arrives. Seriously.
One email. No spam. Unsubscribe anytime.
Instructions
- Wake up the gelatin:
- Sprinkle gelatin over cold water in a small bowl and let it sit untouched for five minutes, soaking up every drop. This blooming step is non-negotiable if you want a smooth final texture instead of grainy bits.
- Warm the cream and milk:
- Pour them into a saucepan and heat gently over medium heat until you see wisps of steam and tiny bubbles forming around the edges, but don't let it boil or you'll scald the dairy. This should take about five minutes.
- Steep the hojicha:
- Add the tea leaves to the hot cream mixture, cover the pan, and let it sit for ten minutes so the toasted flavor fully infuses. The kitchen will smell incredible, like a cozy tea house mixed with vanilla.
- Strain with care:
- Pour everything through a fine mesh sieve, pressing gently on the leaves with the back of a spoon to squeeze out every bit of flavor, then discard them. Don't rush this or you'll have gritty panna cotta.
- Dissolve the sugar:
- Return the strained liquid to the pan, add sugar, and stir over medium heat until you can't see any granules anymore, about two minutes. This is where you taste it mentally, knowing the sweetness is now set.
- Bring the gelatin home:
- Remove from heat and stir in your bloomed gelatin until it completely disappears into the warm cream, then add vanilla extract. The mixture should look glossy and unified now.
- Pour and chill:
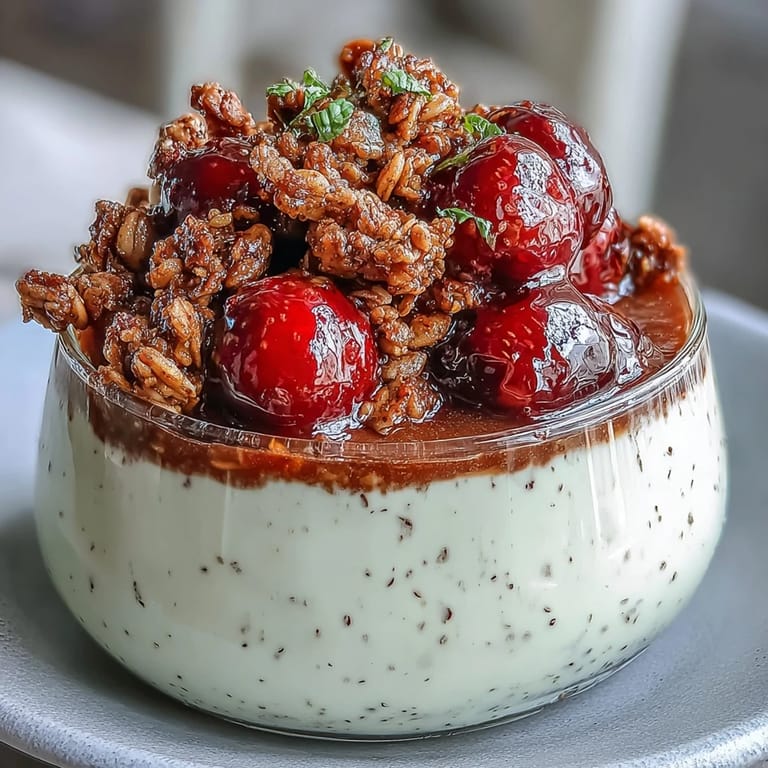
- Divide the mixture among four serving glasses, filling each about halfway, then slide them into the fridge. Let them set undisturbed for at least four hours, or overnight if you're not in a rush.
- Prepare the berries:
- While the panna cotta firms up, toss your berries gently with a tablespoon of sugar and let them sit for ten minutes to release their juices. This creates a light syrup that pools beautifully on top.
- Layer and serve:
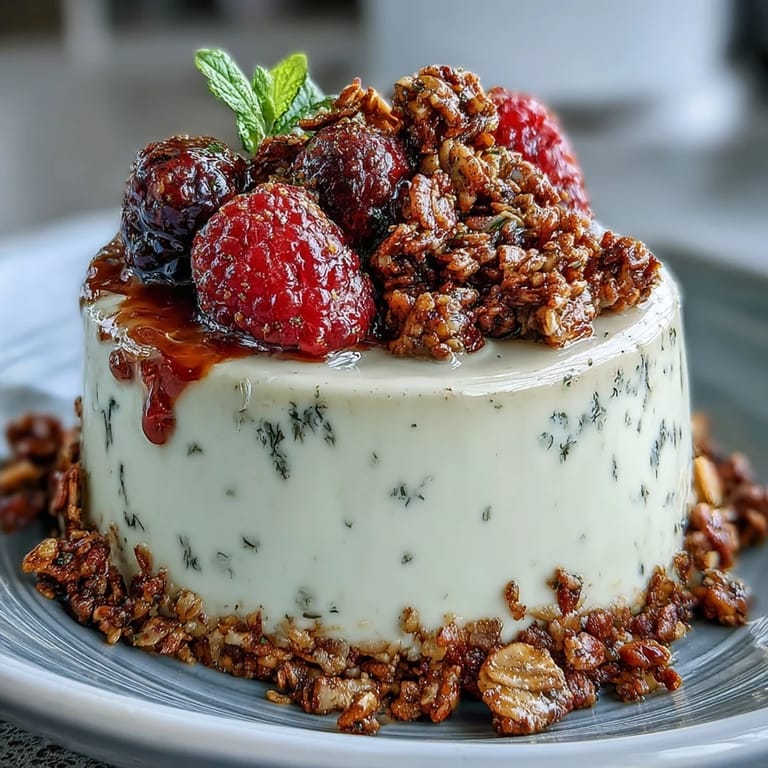
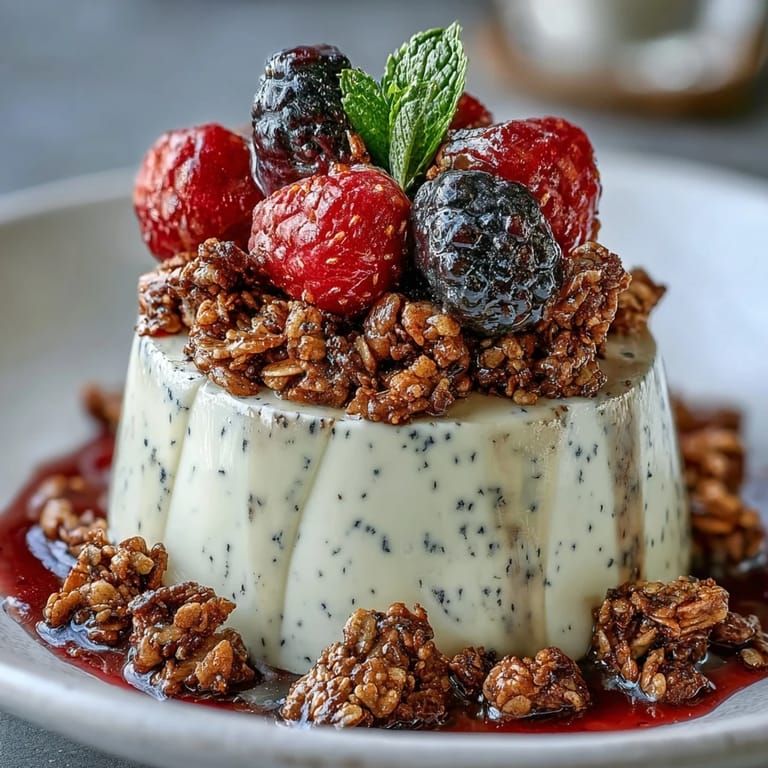
- Once the panna cotta is completely set, spoon a layer of granola over each glass, then top with the berries and their liquid. Serve immediately so the granola stays crunchy.
 Save Pin
 There's a moment when you pull these glasses out of the fridge and see that creamy tan layer glistening under the kitchen light, and you know you've nailed something special. It's a dessert that feels both simple and refined, the kind of thing that reminds you why you love cooking in the first place.
Why Hojicha Makes Everything Better
Hojicha isn't like regular green tea, which can taste grassy or vegetal if you're not careful. The roasting process darkens the leaves and mellows the flavor into something almost caramel-like, with notes of nuts and toasted grain that feel familiar even if you've never tasted it before. When you steep it in warm cream, it doesn't shout at you, it whispers, creating a background flavor that lets the berries and granola shine while still being the reason you keep coming back for another spoonful.
The Art of Layering
Layering isn't just about looks, though these parfaits are absolutely gorgeous. Each texture serves a purpose: the creamy panna cotta soothes your palate, the granola gives you something to bite down on, and the berries bring brightness and tartness that cuts through the richness. The order matters too, because if you reverse it, you lose that satisfying transition from spoon to taste to feeling in your mouth.
Making It Your Own
This recipe is a starting point, not a rulebook. I've served it with dark chocolate shavings, with a drizzle of honey instead of macerated berries, and once with toasted sesame granola because I wanted to lean into the Japanese-fusion vibe. Some people love adding a tiny pinch of matcha to the cream mixture for a more herbaceous flavor, while others prefer it purely hojicha. Trust your instincts and don't be afraid to experiment.
- If you're vegan, coconut cream works beautifully in place of heavy cream, and agar-agar sets up faster than gelatin with a slightly different texture.
- Toast your granola an extra minute or two before layering if you like it extra crunchy and nutty.
- Make the panna cotta up to two days ahead and add the berries and granola just before serving for the best texture contrast.
 Save Pin
 This dessert has become my secret weapon for when I want to show up for people without exhausting myself in the kitchen. It's proof that elegance and simplicity aren't opposites, they're just two ways of saying the same thing.
Recipe FAQs
- → What makes hojicha special in desserts?
Hojicha is roasted green tea with a naturally nutty, toasty flavor and lower caffeine than other green teas. Its earthy profile pairs exceptionally well with creamy dairy and sweet fruits, adding depth without bitterness.
- → Can I prepare this dessert ahead?
Absolutely. The panna cotta layer can be made up to 2 days in advance and refrigerated. Add granola and berries just before serving to maintain their crisp texture and fresh appearance.
- → What berries work best?
Mixed berries like strawberries, blueberries, and raspberries provide lovely color and tart-sweet balance. You can also use blackberries, cherries, or sliced stone fruits depending on season and preference.
- → How do I achieve the perfect panna cotta texture?
Ensure gelatin blooms fully in cold water before incorporating. Strain the infused cream thoroughly to remove tea leaves. Avoid boiling after adding gelatin, and chill at least 4 hours for a proper set.
- → Can I make this dairy-free?
Yes. Substitute heavy cream and whole milk with full-fat coconut cream and use agar-agar powder instead of gelatin. The coconut flavor complements hojicha beautifully while creating a vegan alternative.
- → What other teas can I use?
Matcha creates a vibrant green version with grassy notes. Sencha offers a lighter, more delicate flavor. Earl Grey or chai can work for different profiles, though they deviate from the Japanese inspiration.