 Save Pin
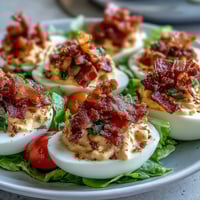
 I discovered these by accident one Sunday afternoon when I was arranging a charcuterie board and noticed how the meat and cheese edges were curling up slightly at room temperature. That little detail sparked an idea: what if I baked them to make something crispy instead? Twenty minutes later, I pulled out the most addictive snack I'd made in years. Now whenever I have people over, someone always asks for the recipe to these salty, crunchy chips that taste like concentrated charcuterie happiness.
The first time I brought these to a dinner party, my friend grabbed three in a row without thinking, then looked at me in actual shock and asked what I'd done to make something so crunchy. That reaction became my favorite kitchen moment of the year because it was so genuine and unfiltered.
Ingredients
- Thinly sliced salami (100g): Look for varieties that are aged and not too fatty—they crisp up best and won't weep grease all over your pan.
- Thinly sliced prosciutto (100g): The thinner you can get it, the crispier it becomes; ask the deli counter to slice it paper-thin if they'll do it.
- Thinly sliced pepperoni (100g): Quality matters here because it's front and center once baked; splurge a little on the good stuff.
- Hard cheese like aged cheddar, Manchego, or Parmesan (100g): These have low moisture content so they crisp rather than melt into puddles.
- Semi-hard cheese like Gouda or provolone (100g): These add a slightly creamier crunch and won't brown as fast as the hard cheeses.
- Fresh herbs and cracked black pepper (optional): Sprinkle these on the cheese before baking to add subtle depth without overwhelming the natural flavors.
Tired of Takeout? 🥡
Get 10 meals you can make faster than delivery arrives. Seriously.
One email. No spam. Unsubscribe anytime.
Instructions
- Heat your oven and prep your station:
- Get your oven to 375°F (190°C) and line two baking sheets with parchment paper—this step saves you from scrubbing burnt cheese bits later. Having everything ready means you're not fumbling around while things are cooking.
- Arrange the meats for maximum crispiness:
- Lay the salami, prosciutto, and pepperoni slices on one baking sheet in a single layer, making sure they don't touch or overlap. This lets the hot air circulate and makes every piece crispy instead of steamed.
- Set up the cheese separately:
- Put the hard and semi-hard cheese slices on the second baking sheet, spacing them apart because they'll shrink and bubble as they cook. A little breathing room prevents them from fusing into one big cheese mass.
- Season if you're feeling it:
- Sprinkle the cheese with fresh herbs or cracked pepper now if you want—the heat will toast the flavors into them. Skip this if you prefer to taste the pure cheese and meat.
- Bake the meats first:
- Put the meat sheet in the oven for 8–10 minutes until the edges brown and crisp up completely. You'll start smelling that toasted, salty aroma that tells you you're close.
- Bake the cheese separately:
- The cheese goes in last for only 6–8 minutes because it browns faster than you'd expect; pull it out when it's golden and just starting to bubble. Let it cool on the pan for 5 minutes so it sets and becomes brittle rather than floppy.
- Cool everything completely:
- This is the secret nobody tells you—the chips continue to crisp up as they cool, so patience pays off. Once they're room temperature, they'll shatter between your teeth in the best way.
- Plate and serve:
- Arrange your cooled chips on a platter and serve right away while they're at their crispiest. They start to soften after about an hour, so eat them fresh.
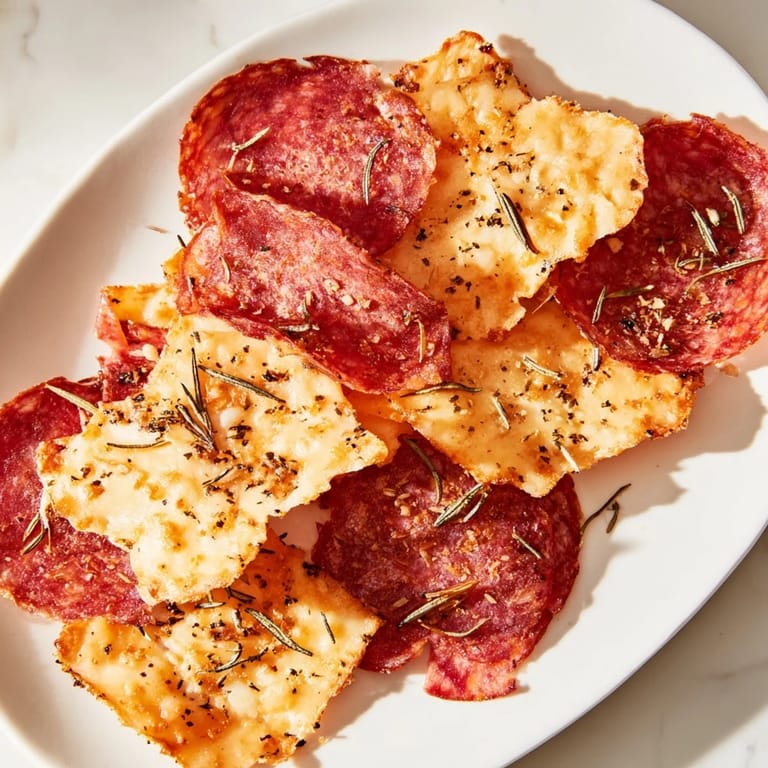
 Save Pin
 These chips taught me that sometimes the best discoveries come from watching food do unexpected things in the oven. Now whenever I'm prepping for guests, these are the first thing I make because they never, ever fail to impress.
Timing and Temperature
The oven temperature really does matter here—375°F hits the sweet spot where cheese crisps without burning and meat dries out without becoming leather. I learned this the hard way by trying 400°F once and ending up with blackened edges and a kitchen that smelled like a barbecue got angry. Lower temps like 350°F take too long and the meat stays slightly chewy, so stick with the 375°F recommendation and set a timer so you don't forget about them while you're setting the table.
Meat Selection and Quality
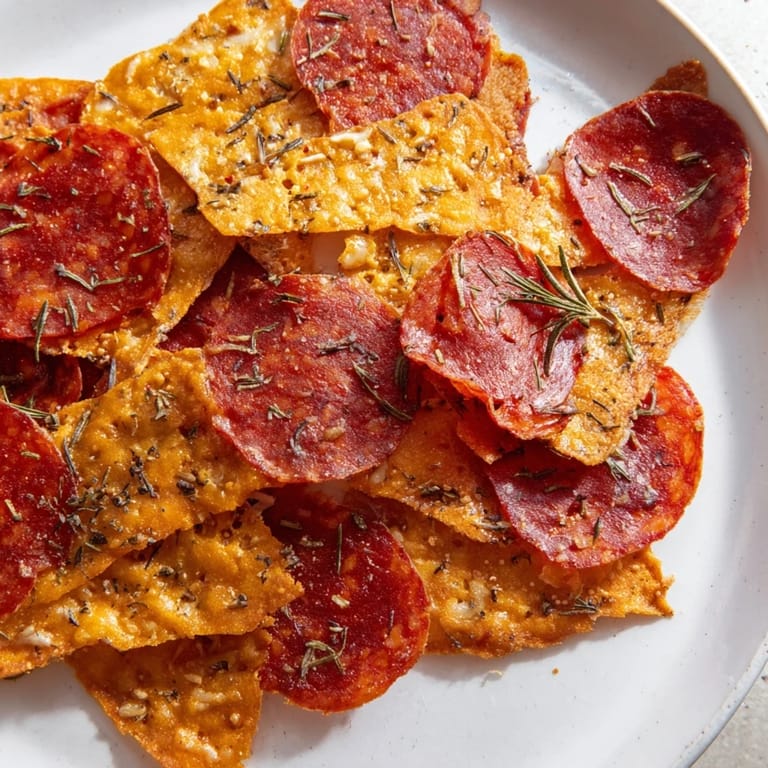
This recipe really shines when you use meat and cheese that you actually enjoy eating on a regular board. The heat just concentrates whatever flavor is already there, so if you use generic salami, you'll get concentrated generic flavor. My favorite version uses really good spicy salami, smoky prosciutto, and sharp aged cheddar because those flavors actually get better when you take out the moisture through baking.
Storage and Serving Ideas
Leftovers keep in an airtight container at room temperature for about two days, though they soften slightly as they sit. They're best served the same day you make them, maybe with olives, pickles, or cornichons on the side to add fresh tartness to all that rich saltiness. I've also tucked them into salads or alongside a cheese plate when I want something that stands out from regular sliced cheese.
- Try pairing them with a light red wine or crisp white wine to cut through the richness.
- For extra flavor, dust the cheese with smoked paprika or add fresh rosemary before baking.
- Store in a completely dry container because any moisture will soften them faster than you'd like.
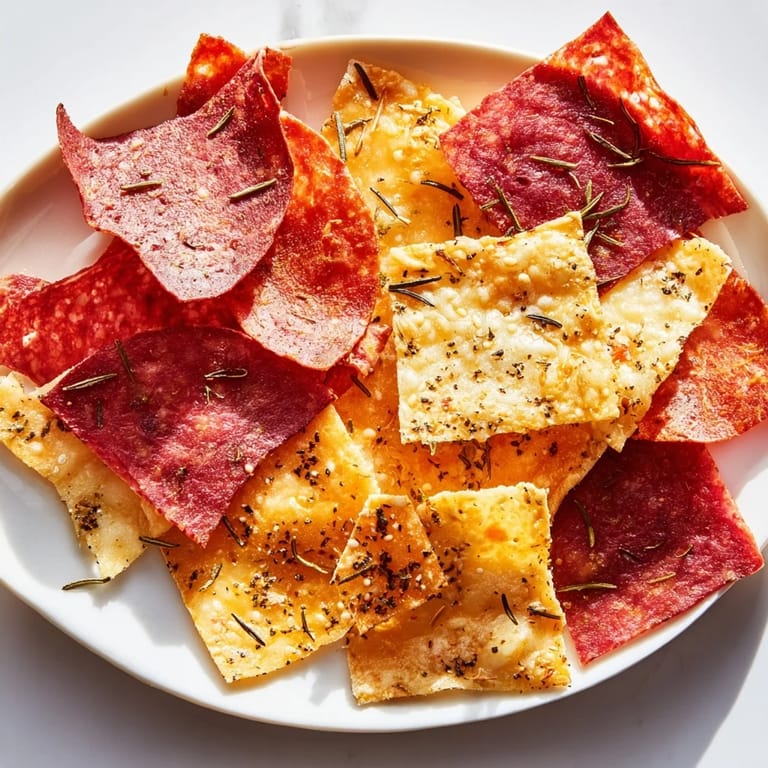
 Save Pin
 These chips turned into my secret weapon for last-minute entertaining because they look fancy but taste like what they actually are: pure, concentrated meat and cheese goodness. I hope they become your favorite too.
Recipe FAQs
- → What meats work best for charcuterie chips?
Thinly sliced cured meats like salami, prosciutto, and pepperoni are ideal, as they crisp well without curling excessively.
- → Can I use different cheeses for these chips?
Hard and semi-hard cheeses such as aged cheddar, Manchego, Gouda, or provolone work well and create a crisp, flavorful texture.
- → How should I bake these chips to achieve crispiness?
Bake cured meats for 8–10 minutes until edges brown and cheeses for 6–8 minutes until golden and bubbling, allowing them to cool for extra crunch.
- → Are there seasoning options to enhance the flavor?
Fresh herbs like thyme or rosemary and cracked black pepper can be sprinkled on cheese slices before baking to add aromatic complexity.
- → How can leftover chips be stored?
Keep leftovers in an airtight container at room temperature for up to 2 days to maintain crispness and flavor.